

Angular is close to heart and its injustice to not create an Angular journey series where we take a learning path to explore the Angular from a beginner's eye. In this article we will start a learning series to understand and explore the modern Angular framework.
Angular has a steep learning curve. This statement is true, no doubt, but valid for other JS framework as well, if we are considering the whole some approach to learn something. In other framework/libraries like React the learning curve is not very short either, to build a full-scale app the requirement is similar so do the learning curve. It's just that how much content from the framework/library covers by its own.
Angular in particular is a framework carrying lots of modules and features within in its own scope for which you don't have to hunt for any third-party NPM packages. This inclusiveness makes the learning curve steeper as compared to its counter parts, plus the TypeScript is cherry on cake. Angular is one stop shop for most of your UI framework needs.
Enough of justifications if someone wants to learn Angular, they will do so. So, with that let us begin our journey to explore the Angular framework.
We will head in this direction:
Let us get started!
Angular carrying the flag of SPA since very beginning. It's a versatile and mature framework to rely upon for any demanding and enterprise scale apps. I personally never face situation struggling to match up with most harsh app requirements, Angular can handle the pressure by providing many ways to handle situations, ranging from forms, routing, state management, unit testing etc. For further read checkout Angular Official Website.
So, before you start your Angular journey you must be equipped with below arsenal:
Angular is has its own CLI tool to live with. This tool has many potential and capabilities, one can create a new app, build it, run test and serve the app as well. Checkout more from Angular CLI page.
Take a fresh working directory to setup your project and run below command:
ng new ng-notesy-app --standalone=falseHere, note that we are setting the standalone flag to false which is by default true post Angular v17. We are considering the module driven approach of Angular which is been there since v2 to v16 by default. Reason here is to get familiar with a version which code base is widespread as per today's date. Later, will have v18 version as well within the same journey, to cover how does standalone component approach looks like.
This will ask some questions, provide below options:
? Which stylesheet format would you like to use? Sass (SCSS)
? Do you want to enable Server-Side Rendering (SSR) and Static Site Generation (SSG/Prerendering)? no
Once options are provided, your project will be created, but with "node_modules" folder.
Your project structure will look something like this:
ng-notesy-app
|-- .angular
|-- node_modules
|-- public
| |-- favicon.ico
|-- src
| |-- app
| | |-- app-routing.module.ts
| | |-- app.component.html
| | |-- app.component.scss
| | |-- app.component.spec.ts
| | |-- app.component.ts
| | |-- app.module.ts
| |-- index.html
| |-- main.ts
| |-- styles.scss
|-- .editorconfig
|-- .gitignore
|-- angular.json
|-- package-lock.json
|-- package.json
|-- README.md
|-- tsconfig.app.json
|-- tsconfig.json
|-- tsconfig.spec.jsonLet us clear the initial boiler plate code and make our app empty. Remove everything from app.component .html, .ts, .scss and style.scss files. Just add one h1 tag with "Hello World" written inside it to the app.component.html file.
<h1>Hello World</h1>Now, if you run your app using "npm start" command you only able to see "Hello World" printed on the screen on "localhost:4200".
We will add Bootstrap for UI capabilities and Bootswatch theme on top of Bootstrap just to keep it funky. We will also use Bootstrap Icons for keeping our app rich in UX. For this add below dependencies:
npm i bootstrap
npm i bootswatch
npm i bootstrap-icons
For setting up Bootstrap and use Bootswatch theme, go to "style.scss" file and add below line:
@import '../node_modules/bootswatch/dist/litera/bootstrap.min.css';
@import '../node_modules/bootstrap-icons/font/bootstrap-icons.min.css';
Now, go to "angular.json" file go to the script property "projects > architect > build > options > scripts" and add Bootstrap bundled JS file:
"scripts": [
  "./node_modules/bootstrap/dist/js/bootstrap.bundle.js"
]Let us open the "app.component.html" file and start painting our imaginations. Right now, our "app.component.html" looks like this:
<h1>Hello World</h1>Will add the base of Bootstrap, that is container:
<div class="container my-5">
  <div class="row">
    <div class="col">
        <h1>Hello World</h1>
    </div>
  </div>
</div>
Adding now the header and footer component. Create a folder called "components" in which will have header.component and footer.component. Will use Angular CLI command to create the component, there are many commands of Angular CLI you can check them out from here Angular CLI Commands:
ng generate component header
ng generate component footer

// or

ng g c header
ng g c footer
Starting with "header.component" first:
<h1 class="text-center mt-5 display-1 fw-bolder text-dark-emphasis">
  <i class="bi bi-snow2 text-success"></i> notesy
</h1>
Then, "footer.component" component:
<div class="text-center p-5 bg-light">
All rights reserved © 2024
</div>Here, will make the year dynamic, add the current year variable in the footer TS file:
import { Component } from '@angular/core';

@Component(...)
export class FooterComponent {
  year = new Date().getFullYear();
}
Use this variable inside the footer HTML file using interpolation {{}}:
<div class="text-center p-5 bg-light">
All rights reserved © {{year}}
</div>Now, let us add it to app component:
<app-header></app-header>

<div class="container my-5">
  <div class="row">
    <div class="col">
        <h1>Hello World</h1>
    </div>
  </div>
</div>

<app-footer></app-footer>Create a form for entering new note, this form will be dead simple, with only input text field and an add button.
<form>
  <div class="input-group mb-4">
    <input type="text" class="form-control" placeholder="Write some notes..." />
    <button class="btn btn-success" type="submit" title="add">
      <i class="bi bi-plus-lg fs-5 fw-bolder"></i>
    </button>
  </div>
</form>
Here, we have created HTML form with input and a button.
Create an empty component now with beautiful message to convey that there are not notes present to show.
<div class="text-center p-3 text-muted">
  <h1 class="display-4 text-secondary">
    <i class="bi bi-egg me-2"></i>
  </h1>
  No notes found
</div>
Here, notice that we have kept a false before the UI div, this is because the empty message will displayed in case if there are not notes present. So, for now if you want to see visually how it is appearing just make it true instead of false.
Add these components to app component as shown below:
<app-header></app-header>

<div class="container my-5">
  <div class="row">
    <div class="col">
        <app-form></app-form>
        <app-empty class="d-none"></app-empty>
    </div>
  </div>
</div>

<app-footer></app-footer>Before we jump to design our list component to show a list of cards for individual note, it's important to create an item component that shows a note in a card format.
<div class="card bg-body-secondary border-0 mb-2">
  <div class="card-body">
    <p class="card-text">
      <span class="d-flex justify-content-between align-items-center">
        <span>Lorem ipsum dolor sit amet consectetur adipisicing elit. Nam, debitis?</span>
        <button type="button" class="btn btn-light ms-3">
          <i class="bi bi-trash-fill text-danger fs-6"></i>
        </button>
      </span>
    </p>
  </div>
</div>
Here, we have added static content within the span tag as a placeholder, later will see actual values.
Finally, let us build the parent List component which will have an array of notes, and these notes will be looped to show the note content using Item component. For now we will skip the array and loop part and focus to place item components. Let us see what we are talking about:
<app-item></app-item>
<app-item></app-item>
<app-item></app-item>
Here, we have just added the 3 item components to show list of cards appearing.
Add the list component to app component so that we can be able to see the notes on the screen:
<app-header></app-header>

<div class="container my-5">
  <div class="row">
    <div class="col">
        <app-form></app-form>
        <app-list></app-list>
        <app-empty class="d-none"></app-empty>
    </div>
  </div>
</div>

<app-footer></app-footer>Finally let us have a look how our entire app is looking now:
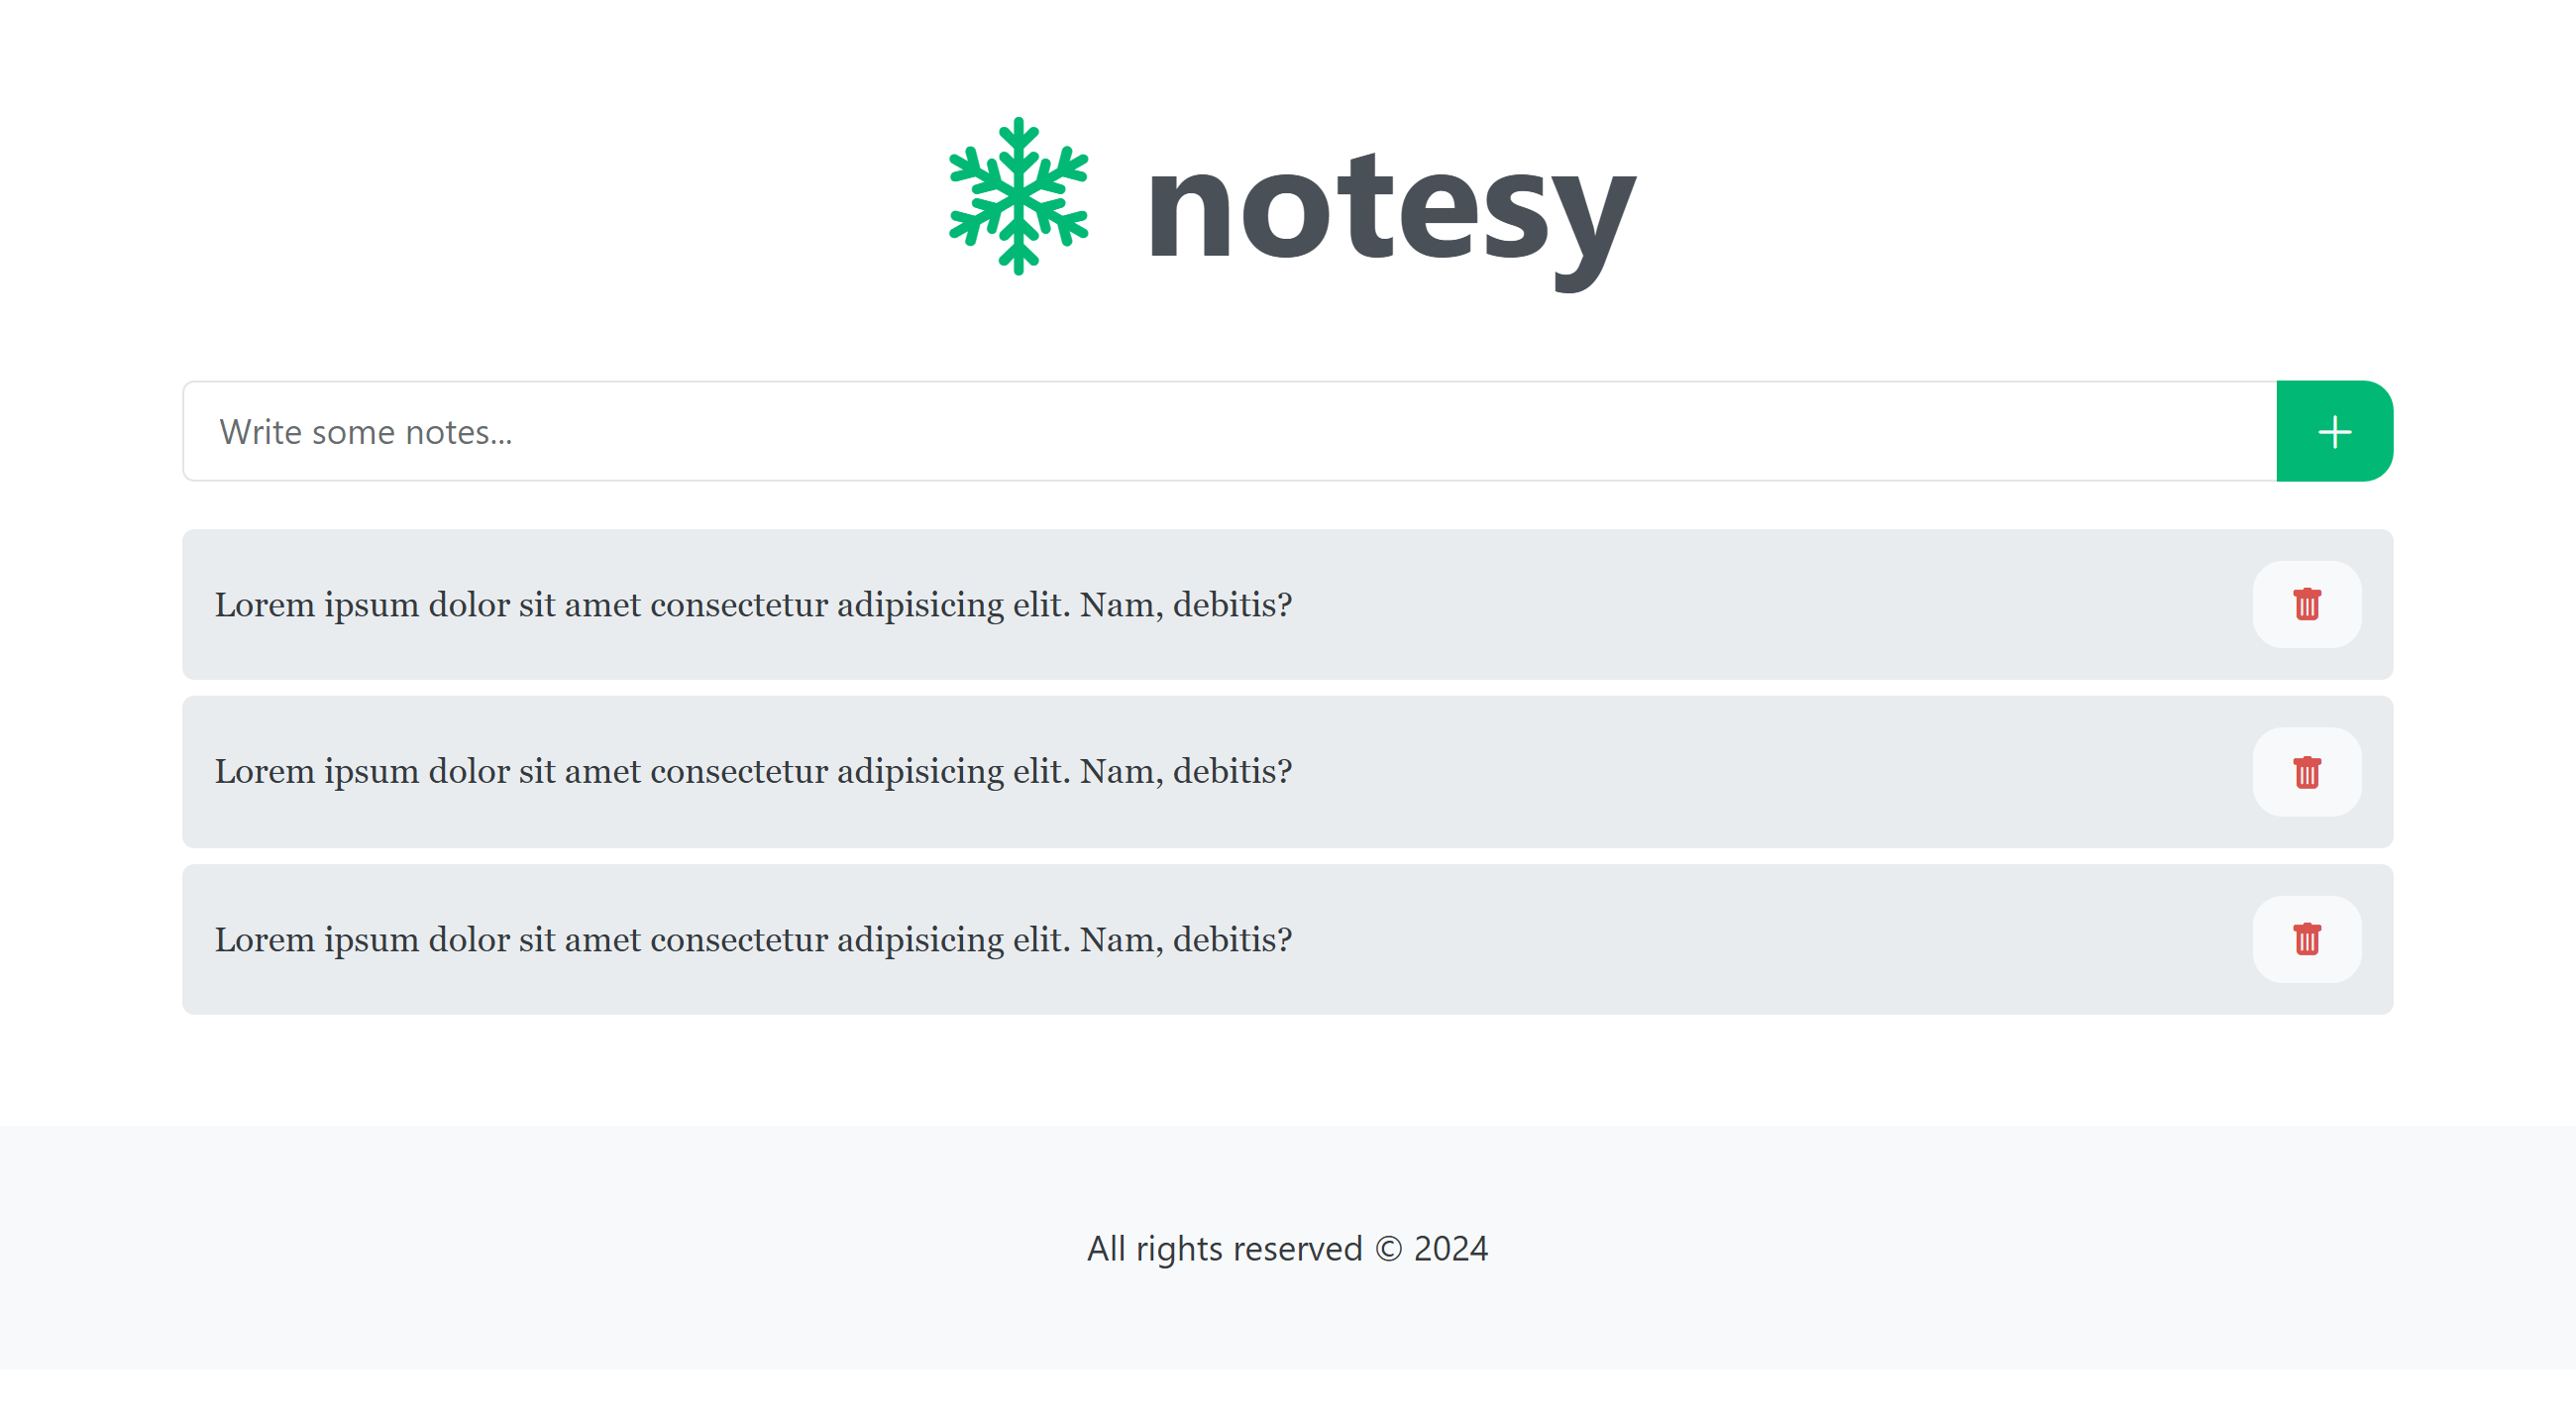
Looks pretty decent; and this is how our project structure is looking now:
ng-notesy-app
|-- .angular
|-- .vscode
|-- node_modules
|-- public
| |-- favicon.ico
|-- src
| |-- app
| | |-- components
| | | |-- empty
| | | | |-- empty.component.html|ts|scss|spec.ts
| | | |-- footer
| | | | |-- footer.component.html|ts|scss|spec.ts
| | | |-- form
| | | | |-- form.component.html|ts|scss|spec.ts
| | | |-- header
| | | | |-- header.component.html|ts|scss|spec.ts
| | | |-- item
| | | | |-- item.component.html|ts|scss|spec.ts
| | | |-- list
| | |   |-- list.component.html|ts|scss|spec.ts
| | |-- app-routing.module.ts
| | |-- app.component.html|ts|scss|spec.ts
| | |-- app.module.ts
| |-- index.html
| |-- main.ts
| |-- styles.scss
|-- .editorconfig
|-- .gitignore
|-- angular.json
|-- package-lock.json
|-- package.json
|-- README.md
|-- tsconfig.app.json
|-- tsconfig.json
|-- tsconfig.spec.json
In the GitHub repository, you can find project for this article in the directory called "ng-1-init", the other folders are for the further milestone.


December 31, 2020

October 19, 2020

March 02, 2022
CodeOmelet is perfect for code hunger; its a coding blog containing articles and solutions related to web, mobile, cloud, console, desktop applications for the developers.

October 11, 2025

October 11, 2025
 .NET C#
 Azure
Azure
 JavaScript
 JEST
JEST
 NodeJS
 React
React